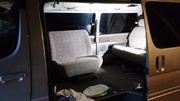
So, the two-seat chair in the SC rotated the wrong way around, so I took it out and took it to bits to investigate.
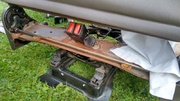
Interestingly the seat base base and support are bare steel, no paint at all. So there were some rusty bits I painted in Kurust.
So you have options.
Just flipping the seat:
=================
This is the easy option and just makes the seat turn the right way, but still limits it to 180 degrees.
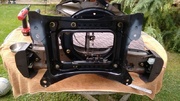
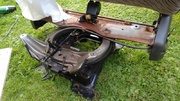
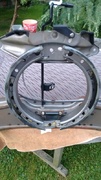
You need to get rid of the plastic and look closely at the runners under the seat. There are four black welded bolts that have nuts that hold the whole swivel+seat onto the runners.
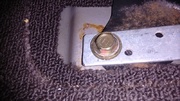
You will also need to release the runner release spring lifter (activated by the control under the front of the seat), turn the seat so that the flat lines up with the slot and it unhooks from the cup.
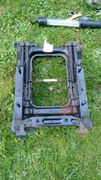
BTW if you want the seat base out of the way, it's held on with 4 medium yellow bolts, fold the back down horizontal and it will then lift off.
Turn the seat so you can see the back. In the back on the swivel is a slot - that slot allows you to access all the nuts. Undo the runner bolt nuts to lift the seat off. Ironically this is a great deal easier if you have already made it rotate 360 degrees (see next section). There is also a gap on the inside of the front if you leave it at 180deg.
When you do this realise that when you lift the chair off the runner bolts two of the internal guides will now be loose in the swivel and need poking a bit to line them up if you disturb them - to fit back onto the runners again.
Making it turn round and round
========================
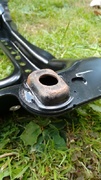
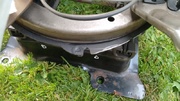
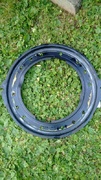
At 180 degrees each side of the swivel is a locking slot. As you will see, the slots are biased to one side, you will need an angle grinder and some care to trim them to become symmetrical, then the seat will swing any way and still lock in the two positions. When you do this you should probably protect the gap in the swivel with some masking tape, as the bits will go down and cause problems.
Try not to grind them all off in one go as you'll cook the plastic in the swivel. Toyota thoughtfully doubled up the metal at this point so it needs a lot of grinding. I'd recommend you do this outside and make sure the sparks go away from the seat material and protect the base frame paint with a cloth. It's also possible the cloth will catch fire so maybe dampen it.
Being really keen and re-greasing the swivel
==================================
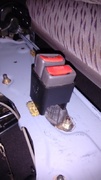
If you want to do this, use the slot in the back of the swivel to undo all 8 nuts, but leave the lone 2 on until you get the chair out to somewhere you can work on it. The lone 2 are the only 2 not bolted to the runner frame/base, they just hold 2 guides in the swivel.
I used moly grease - try to use a grease good at sliding, as there are no rollers, it's plastic, grease and metal bearing directly on the outer of the swivel. Lots of blue paper roll is good at cleaning out the old grease.
Warning: Re-assembly is fiddly and needs another person. There are 4 guides in the swivel, 2 are held by the lone 2 bolts (each guide goes from a runner bolt to a yellow bolt - i.e. they span the corners. The other 2 are loose, and not held in until you bolt it to the runners again. I found it easier for a person to hold the seat so the swivel was the way up it is in the car, and plug the base/frame in from underneath, then transfer the whole assembly to the floor, carefully tilt the seat up fully again and then pop the nuts on to hold it all together.
Other notes
==========
Once the seat base is off, this is an excellent time not just to degrease and paint the bare metal, but also to clean the seats with any valet products etc, as you can reach all the fabric.